diy decorative mirrors and my office space

desk area with diy mirrors

I have been wanting to hang a big mirror in this corner of my living room for a long time. But big mirrors cost big money, and I wasn’t ready to commit.

But I was in trouble–isn’t it so drab with nothing on the wall?

desk area: before

So instead of one big mirror, I used six mirror tiles from Home Depot. I thought several little mirrors might have the same effect as one big one, and Home Depot (and Lowes, I think) sells a pack of tiles for just $10.

After looking for some frames, I realized 6 little frames would be just as much as one big one. So to save money but still look good (I hope) I got some decorative paper from Paper Source. I measured so that the mirrors would have a two-inch border of paper, and I used double-sided tape to adhere the paper to the mirrors.

diy mirror with decorative frame supplies

decorative papers

And then I used 3M picture hanging strips to get them on the wall. The whole project cost less than $50–way cheaper than the mirrors I had been eyeing. Actually, the most expensive part of the whole project was the 3M strips, so if you used a different method to hang them, it’s possible to make this even cheaper.

I’m so much happier to get to work now that my little corner office is bright and cheery!

desk area with diy decorative mirrors

a selfmade dress and what i wore

rae's days handmade dress

I have been thinking a long time about sewing a dress or outfit but it took me a long time to pull the trigger. It sounded intimidating–I have sewn a little bit but not really any clothes. Patterns and fabric seemed expensive and difficult to try out if I wasn’t sure it would turn out.

But then I saw Corinne’s tunic on the Purl Bee. It looked just simple enough that maybe I could do it. And it looked so cute on their Facebook page. (And it only needs 2 yards of fabric!)

rae's days sewing a dress

So I picked up a few yards of a light gray cotton from JoAnn’s and got to sewing! I don’t have instructions because the Purl Bee already has all that covered. It took a few hours, and ripping out a few seams, but I think it was a great, simple dress for a beginning project.

And the best part is, now I’m ready to sew a lot more!

rae's days self made dress

beyonce (embroidery nos. 18-19)

beyonce embroidery

Going to the Beyonce concert this year with my friend Laura was one of the best things that ever happened to me–no lie. We love Bey (but who doesn’t?), and it was so fun to see her sing. So as a gift for Laura before she moved into her new apartment, I stitched some Beyonce lyrics for her to put on her walls.

beyonce embroidery

The best part of making these was that “Crazy in Love” and “Love on Top” were stuck in my head the whole time. I love having handmade things in my home, but I love even more sharing them with friends.

beyonce embroidery

I am working on a project to sew some of my favorite quotes and images. You can see the other pieces of my embroidery project here:

project life: october/november

x_MG_1298

I was lucky enough to get two–TWO–project life kits for Christmas: the midnight edition and the honey edition. And it has made catching up on Project LIfe so much fun.

I’m working on the end of the year and doing roughly a month or event per spread. Obvs, the birth of my adorable niece will get a whole two pages. Here’s the pages I have for the second half of October and first weekend of November.

rae's days project life

rae's days project life left page

rae's days project life right page

As I look through my whole album, there are some pages I really like and some I don’t,  of course. But either way I’m glad I’m recording these pictures. I still have a few events left in 2013 to get into this album, and then it’s onto this new year. At least I’m not too far behind.

You can see my other project life updates here:

Follow my blog with Bloglovin

goldie the gargoyle (embroidery no. 17)

goldie the gargoyle embroidery

It kills me when adorable things show up in comic books. Here I am, reading about a nightmare/King of Dreams/contract killers/reimagined biblical characters and WHAM, something cute drops in the frame.

I’ve been reading through The Sandman–the first issue is just a little younger than I am–and though it took me 25 years to catch on, I’m finally getting up to speed and loving every minute. Along with Death, one of the most fun characters I’ve ever met, I’ve also enjoyed spending time with Dream and his other siblings. And mixed in with the twisting, dark, interesting story lines are hilarious moments of fun. Like a super cute gargoyle called Goldie (aka Irving).

goldie the gargoyle embroidery close up

I’ve been thinking of a way to incorporate Sandman into my project of embroidering books and quotes that I enjoy, and Goldie is a perfect representation of what I love about this series: unexpected fun.

You can’t see dark without the light, or cruelty without kindness, and this epic storyline that takes us in and out of worlds and dreams is all the stronger by including some (adorable) levity.

As you can see on my to-read list, I’m just through volume 7, so if anything terrible happens to Goldie in volumes 8-10, don’t tell me.

embroidery and the sandman vol. 8

I am working on a project to sew some of my favorite quotes and images from books. You can see the other pieces of my embroidery project here:

baby blanket (finished)

finished knitted baby blanket

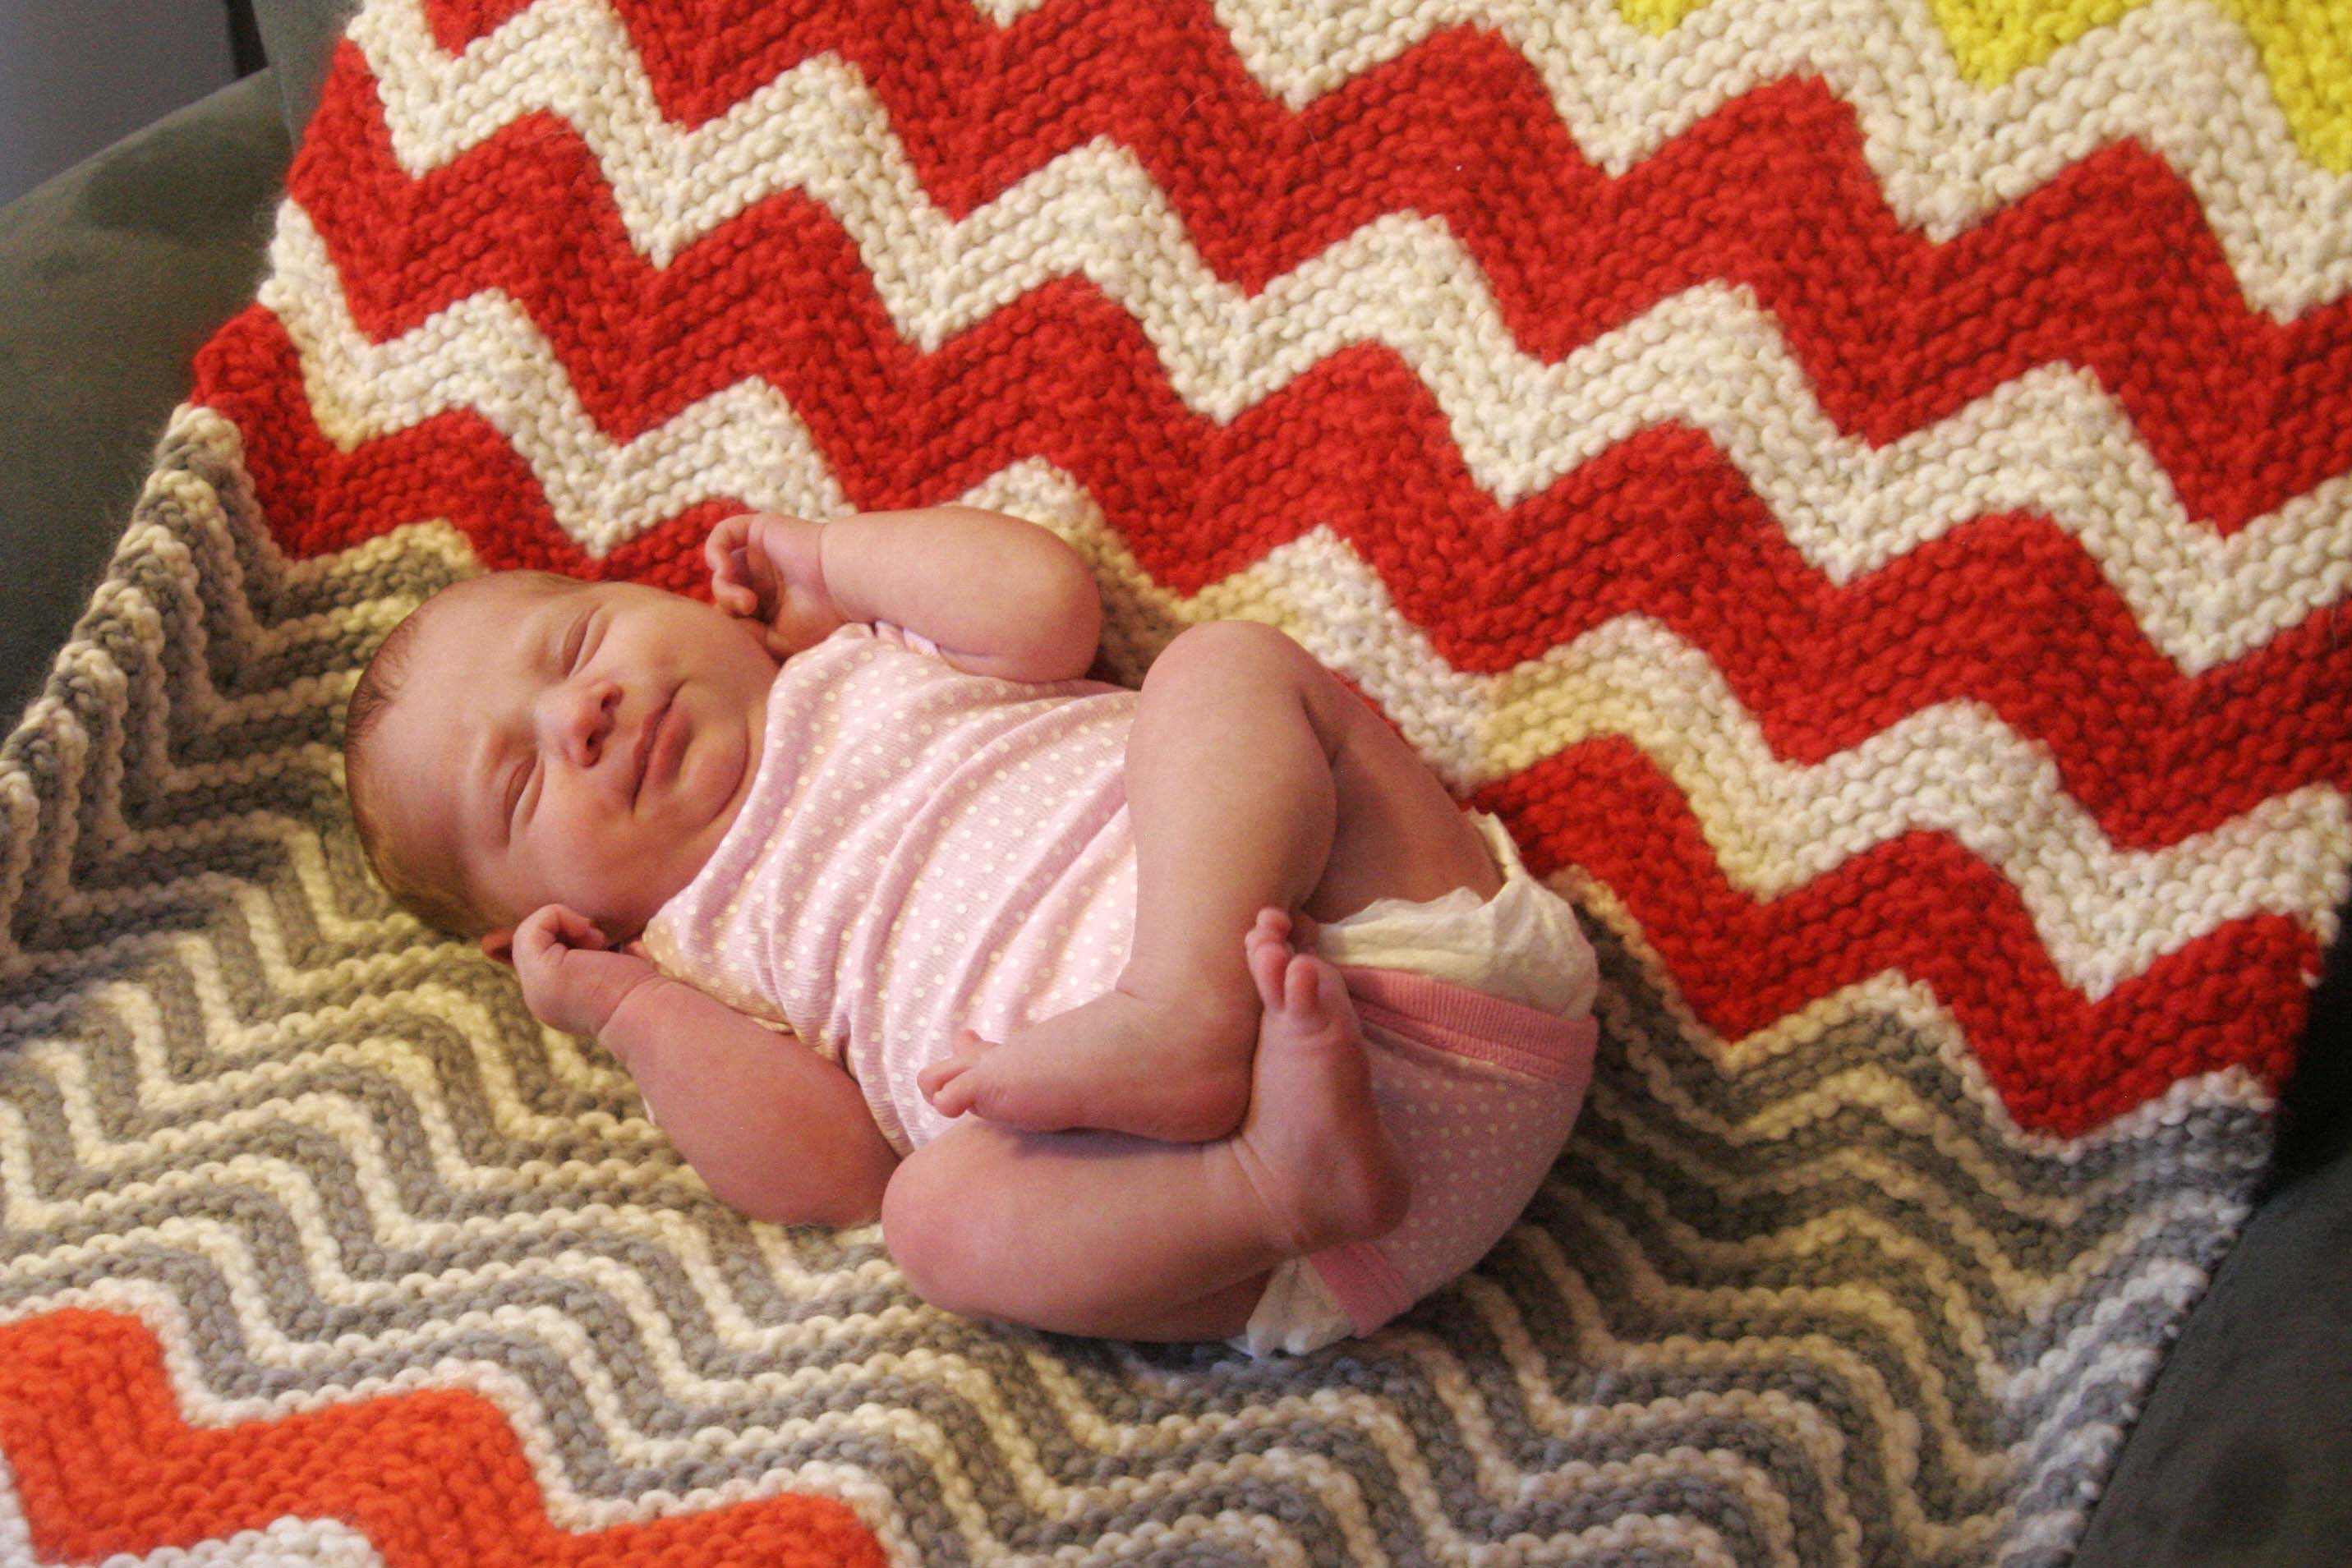
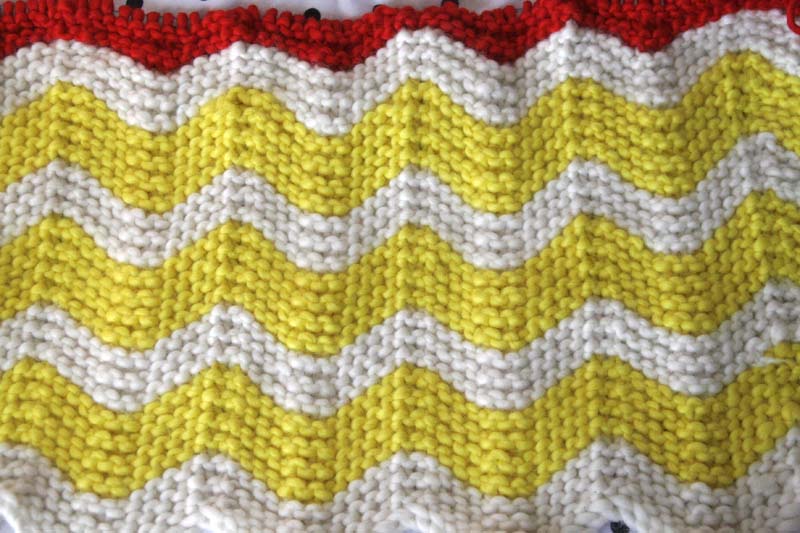
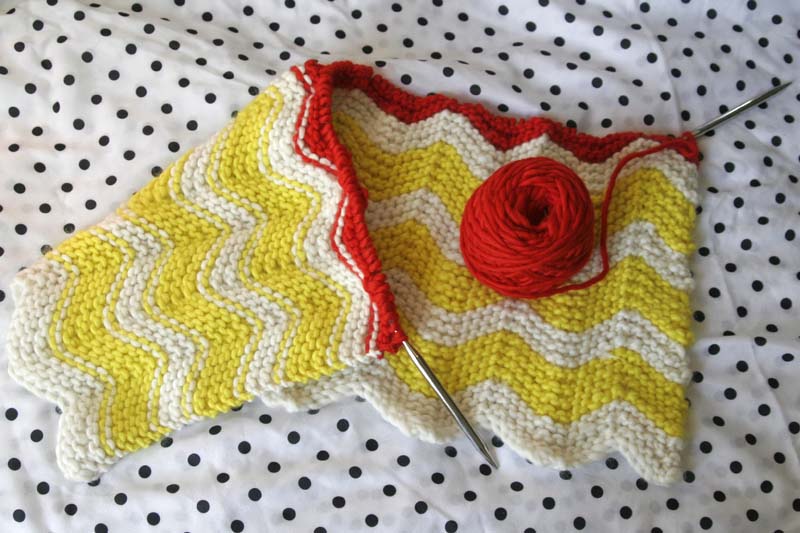
After a marathon knitting session the past week, I finished the baby blanket. (I used a pattern from the Purl Bee for the chevron baby blanket.) A lot of other things got put on hold so that it would be ready by the time I left town for Christmas because I didn’t want to mail something so precious (read: sort of expensive and time consuming).

Now that it’s over, I can’t believe I made it. I mean, I know I did because I spent many hours knitting it and I ran out of yarn six rows too soon two days before my trip and the nice people at Purl Soho made a skein of yarn materialize out of nowhere to help me and I sent out text updates like “10 rows left!” to anyone who would listen. But when I look at it now, I don’t think about that. I think, wow, that’s beautiful. And it’s even more beautiful wrapped around my perfect, perfect niece.

baby nugget in knitted blanket

I’m not a very experienced knitter. Before this blanket I think I just knew how to knit and purl. I could knit or purl two together, and I could maybe increase a stitch or two after looking up how to do it on youtube. But for this baby blanket I learned two new stitches (kfb and ssk). And that was all it took to make a chevron stripe and the biggest thing I’ve ever knitted.

This is why I love taking risks on bigger projects. When I started, it seemed impossible. I messed up a few times, and just kept going. And going, and going, and going. And when it seemed like I would be doing these two stitches for the rest of my days, suddenly I was done.

And now I’m ready to move on to a bigger blanket, or a few new stitches. Who knows where it will take me or what I can make next. I wasn’t even sure I could do this one.

But now that I’m one blanket smarter, I would do a few things differently the next time around. It turns out I knit looser than this pattern really intended. This means that I ran out of yarn faster (I used Purl Soho’s super soft marino), and because this pattern used a whole skein for each color of stripes, I ran out of yarn before I was finished with each section. After this happened the first time, I left out a garter row of my last stripe for every color. This kept me from running out of yarn, but it means that my stripes are of varying sizes. As I’ve said before, I’m no perfectionist, so this was ok by me.

But if I were to make this blanket again, I’d make each color stripe only three garter rows instead of four, and I’d go ahead and buy an extra skein of white yarn from the get-go. So if you’re a loose knitter (which I know now that I am), I’d recommend those modifications. Another thing I learned about knitting loosely is that you’ll end up with a slightly bigger blanket than the pattern indicates. So if you leave out some rows, that would make up some of the difference.

But even with uneven stripes, I think it’s about one of the best things I’ve made. If only because I made it for my brand new niece.

baby nudson in baby blanket

You can see previous progress on the blanket at baby blanketbaby blanket progress (4 inches)baby blanket progress (a note to baby girl)baby blanket progress (11 inches), and baby blanket (a lot of inches).

(I chose this project and paid for the yarn on my own. I’m not affiliated with Purl Soho–I’m just a fan.)

top 10 crafts of 2013

This year has been a wonderfully crafty year. I’ve tried new things and made some I am really proud of. Out of a lot of crafty posts, here are my top 10 favorites.

screen printed card

Screen printed cards. This was a really fun project. I used my at-home screen printing kit to make some fun, punctuation inspired note cards. I definitely want to do more screen printing in 2014.

mischief managed embroidery

Mischief managed embroidery. I have loved starting embroidery this year. I am so happy to have made them and have them hanging up on my wall. I definitely plan to keep embroidering next year. One of my favorites is one of my first, “mischief managed.”

Lying Cat from Saga embroidery

And of course, Lying Cat embroidery is another favorite. I totally enjoyed reading Saga this year and Lying Cat is a star. Plus, sharing this with the illustrator Fiona Staples over Twitter was super cool.

walter white embroidery breaking bad

Walter White embroidery. Breaking Bad was another story I spent a lot of time with this year. My friends and I would obsessively email after every episode, and I just loved it. This tiny tribute to Walter White is a perfect memorial for me.

cross stitch pillow

Cross-stitch pillow. I have loved having handmade items in my home. It’s so personal and fun, and I like that my house has original things you can’t find anywhere else. This pillow turned out great, if I do say so myself.

ka pow comic book inspired sweatshirt

Comic book sweatshirt. I have gotten into comic books this year, and it’s seeping out of my reading and onto my clothing. This sweatshirt was so fun to make and it’s super cute to wear when I need a superhero boost.

wedding project life pages

Wedding project life. This was the year of project life for me. It’s helped me document wonderful moments like the wedding of my best friend. I love looking at the pages!

wedding present embroidered hand towels

Embroidered hand towels. And my wedding gift was another one of my favorite crafts. Such a nice way to give someone something personal. Especially if that someone likes to be in the kitchen.

ugly sweater ornaments

Ugly sweater ornaments. There’s still time to make these before Christmas! Grab some felt and my template and you’re just about good to go. They are so cute on my tree!

baby blanket knitting

And of course the baby blanket. I’m still working on this one, but I bet it will be one of my favorite projects for a very long time. I can’t wait to wrap up my baby niece in it when it’s done!


ugly sweater ornaments

snowman ugly sweater ornament

For a tiny apartment with a tiny Christmas tree, I sure do have a lot of ornaments. I can’t stop! They are miniature works of art and I love to look at them on my tree and in every holiday store or catalog. But good ornaments don’t just have to be professionally done. The best part of some trees is the handmade touches from ornaments you can make yourself. So let’s get to making some. And let’s make them ugly.

Ugly sweaters are one of the best parts of holiday fashion, right? People are even throwing ugly sweater parties. And if you’re a little unsure of your crafting abilities, what better way to hide any mistakes than by making something that should be purposefully ugly. Your first step for your ugly sweater ornaments is gathering materials.

felt and sweater ornament template

I started with a rainbow of wool felt. I like this felt from Purl Soho because it’s high quality wool and comes in really gorgeous colors, but I think any felt would do. Print and use the Rae’s Days Ugly Sweater Template to cut out the shape of the sweaters.

cut out sweaters for ugly sweater ornaments

After you have a few blank sweaters, use any materials you’d like to decorate them. I used felt to cut out shapes and hot glue them on. I wanted to use materials I had on hand, but if I had any sequins, you can bet they’d be all over these.

decorate and assemble your ugly sweaters

After that, step back and admire your work.

ugly sweater ornaments

I am no perfectionist, and these sweaters are no exception. I didn’t measure, and I didn’t worry about getting everything perfect. These are *ugly* sweaters, remember? But I have to say, they look pretty cute in the end. One of my favorites is the Santa sweater. If you wanted, you could use this same template to make Santa ornaments instead. All you need is some white felt for the accents, and some black buttons (I used my hole punch again to make the little felt circles). Once you’re happy with your collection, you need to add some string or yarn so you can get them on your tree.

cutting string for ugly sweater ornaments

I used some gray yarn I had on hand, and I cut it six inches long. On the template, there is a six-inch ruler you can use to measure your string. Then I made a loop with the yarn and hot glued it into the back of my ornament. The easiest way for me to do this was to use a spare piece of felt and glue that to the back to hold the string in the right place.

back of the ugly sweater ornaments

You could use any spare piece of material you have. I cut some into circles because I thought it looked like buttons on the back. Then, hang it on your tree!

ugly sweater ornament hanging on a christmas treechristmas tree with ugly sweater ornaments

Pick up the Rae’s Days Ugly Sweater Template here, and get started! If you make any, I’d love to see them. Please share on Instagram (I’m raenudson) or Twitter (rclnudson) with the hashtag #raesdays!

yarn cross-stitch pillow

cross stitch pillow on rae's days

I have really enjoyed sewing pillow cases for the pillows on my couch. I like picking out the fabric, and I like that they are personal to me. Plus, sewing smallish pillow cases is a generally quick project with a large payoff. This particular pillow project, though, I’ve been sitting on since I saw this photo on Apartment Therapy’s instagram.

apartment therapy instagram inspiration

I love these designs. And I love that they use cross stitching, which I’ve been exploring lately with my embroidery. But this cross stitching is on a large, fun scale. It took me a while to figure out how I could do something similar on my own, but over the weekend I finally got it together.

cross stitch pillow tutorial grid

I started by using some felt I had on hand. It was important to me to use felt because you don’t need to finish the edges for felt, so any holes you create in the felt won’t fray. I knew I wanted it for a 12×12 inch pillow, so I cut my fabric 13×13 inches to allow for a half-inch seam allowance. once  had my square, I used a fabric pencil to draw half-inch grid lines. And then I started hole punching.

hole punches

Figuring out how to create (mostly) evenly spaced holes, and how to cut out many, many tiny circles was the biggest challenge. But would you believe my little hand held hole punch cut through felt? It did. To cut each hole, I folded the fabric along each grid line so that my hole punch could reach the marks where the lines crossed. And then I got to punching. This part took a while, but I think it’s definitely worth it. Once I had my hole-punched canvas, I started stitching, using some extra yarn I had on hand and a large yarn needle that I normally use to sew in the dangling ends of my knitting.

cross stitch pillow

I decided on “hi.” It’s welcoming, casual, and fun. (And also very easy to map out for cross stitching.) After that, I measured and cut fabric for the back of the black felt and the back of the pillow. Once I sewed it all together–leaving a hole to stick your pillow in–I was done!

hi cross stitch pillow

I am really excited to see what else I could do with this idea. There’s unlimited colors and words or patterns I could play with, and it’s just too cute.

cross stitch pillow on couch

baby blanket progress (11 inches)

baby blanket

At about 11 inches, I am a little more than a quarter done with the baby blanket I’m making for my niece (pattern from the Purl Bee). I feel like I really turned a corner once I started a new color.

baby blanket rae's days

It’s gotten a little bit chillier here in New York, and it’s nice to think about this blanket keeping a little baby warm. This stage in a knitting project is nice because you can start to really see what the final product will be. But it’s also hard to know there’s so far to go. I like that the blanket is striped because I don’t get bored with one color and it makes it really easy to mark progress. One stripe done, two stripes done, and on and on until you have several stripes in several colors.

baby blanket stripes

I think it’s coming out so lovely, and I can’t wait to keep going. Since colder nights are coming quickly, I am sure I can hunker down with a warm blanket and get more stripes done in no time. And I better hurry–the baby’s due date will be here before you know it!

You can see previous progress on the blanket at baby blanketbaby blanket progress (4 inches), and baby blanket progress (a note to baby girl).