before and after: kitchen table and chairs

table and chairs: after

I love paint. It’s such a fun and cheap change. And if you don’t like it later, all it takes is more paint. It’s easy and fixable, and it can be a great way to add color and character to your space on a budget. And if you’re a renter who can’t paint your walls, why not paint your furniture?

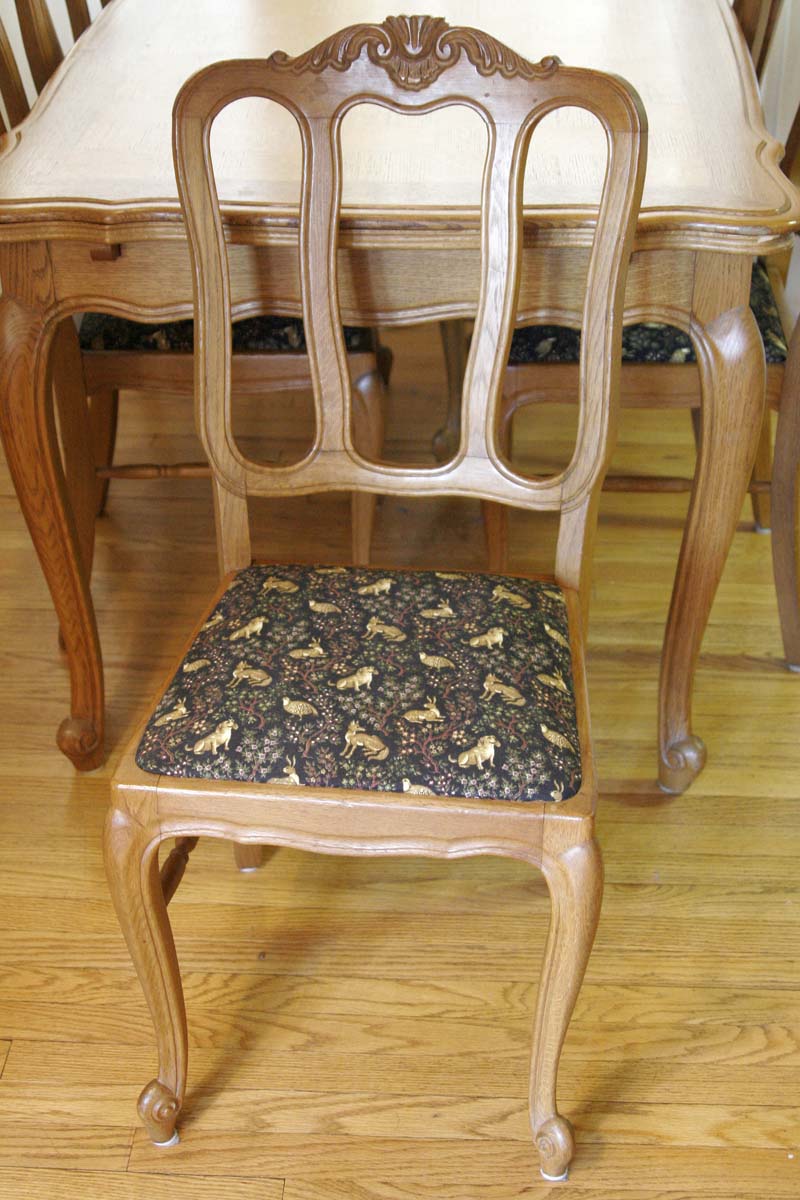
I started with a kitchen table and chairs that, though lovely, were not exactly my style, and I ended up with the perfect fun, bright table set for my kitchen. I guess I spoiled it by starting with the after, but here is the before:

kitchen table and chairs before

The chairs were covered in a forest green with woodland creatures. And the table was very nice, but not my favorite shade of wood.

kitchen table and chairs before

I wanted to add some color and make it my own, so I immediately turned to paint. With a few coats of paint and some new fabric for the chairs, I knew I could turn this table into something brand new and totally me.

I was inspired by an image I saw in HGTV magazine that unfortunately got tossed during the move. I love the strong red and the contrast with the white inside the bathtub. And the delicate wallpaper is so beautiful.

bathroom inspirationI decided on a two-tone table, using a bold color and white, and painted chairs to match. I started by picking out fabric for the chair cushion. I fell in love with this fantastic blue and white fabric that was delicate, graphic, and interesting–like the wallpaper in my inspiration. (Fabric is Valley of Azure, designed by Leah Duncan in the Meadow collection.)

recovered seat cushion

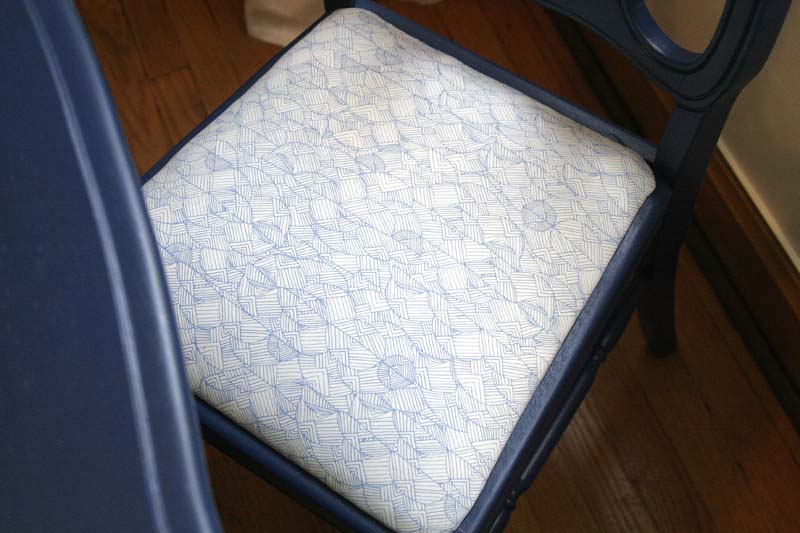
I waffled for days on what colors to choose and exactly how to paint the table, but I ended up with Midnight Swim and a pure white of True Value EasyCare paint in a satin finish. I decided on blue for the top and white on the legs.Continue reading “before and after: kitchen table and chairs”

easy project friday: painted canisters

painted canister tops for the kitchen

This easy project takes a little bit of paint in whatever colors you like, a paintbrush, and some painters tape.

I found these canisters at Goodwill and snagged them for just a few bucks. After a solid scrubbing I was ready to use them in my kitchen. I love the look of white and wood, but I wanted to add some pops of color to my counter.

containers for the kitchen counter

I started by taping off half of the top with painters tape. I used a ruler to help me find the middle, but you could also eyeball it or do a third, or fourth, or a diagonal. This is an easy project–have fun with it!

painted cannister tops

Then I painted half the top with each color. I’d recommend an acrylic paint–it is easy to use and has good coverage for projects like this. I did two coats of paint, but do whatever looks and feels right to you. Only paint the very top of the tops if you’re storing food in them–you don’t want paint fumes enclosed with your food.

Then all you have to do is wait for the paint to dry and slowly peel off that painters tape.

painted canisters for the kitchen

And you’re done! That’s all it takes to get some personal fun and color in your kitchen (or bathroom or bedroom or wherever you want!). Some materials:

(No one paid me to write about this project, but the Amazon links are affiliate. Updated at 10:16 a.m. to add sources to buy canisters)

adventures in spray paint

rae's days shelf before

I have this shelf by my door. I use it to hold my purse or shoes right when I get home. It’s the perfect size for the tiny space between my front door and my closet. And it was black, which was fine. But not great.

So I got some spray paint. And headed to a rooftop.

roof top view

This was the view. Not too shabby. Then I put my shelf on some trash bags and started spraying. It went pretty well for my first time spray painting something, all things considered. I did a few coats and touched up some spots where I thought it was needed. I used Rust-Oleum high performance enamel spray paint in safety yellow.

Continue reading “adventures in spray paint”

odd thomas talks to elvis; i screen print him

I’m reading Odd Thomas by Dean Koontz and loving it. Odd is a pretty normal guy–he works as a line cook, hangs out with his girlfriend, and can speak to the dead. Not that they talk back. But they do show him things, and he helps them when he can. Odd tries to use this gift to help the dead and the living, and in the first novel of the series he attempt to stop a huge tragedy from occurring in his town. I don’t know if he succeeds–I haven’t finished the book yet. But I’m having a great time getting there.

Odd is ghost friends with Elvis, who seems to make his own rules in death, as he did in life. Normally Odd’s interactions with spirits are people who died in his town. He doesn’t know of any ghost travelers–except Elvis, who has taken a liking to Pico Mundo even though there’s no evidence he visited when he was alive. He hangs out often, sometimes dancing, sometimes watching, and sometimes crying, but never singing (ghosts don’t talk, or sing, I suppose).

I’d like to think that Elvis and Odd are sort of friends, at least the kind of friends that spirits who don’t speak and living people who eat and breathe and yell can be. So I made a tribute to Elvis, and to Odd.

I recently took a class on screen printing and really enjoyed it. It’s fun, and once you start making prints it’s pretty addicting. (But be careful, otherwise you’ll have 30 copies of Elvis and nothing to do with them.) I still have an empty space on my wall, and I’ve been longing to fill it with another handmade artwork. And my family gave me a screen printing kit for Christmas, with ink and a screen and everything! The stars aligned.

I started with the idea of an image of Elvis singing and dancing. I found some images I liked, but I wasn’t sure how to get those images onto my larger canvas that would fill up the empty space on my wall. I’m ok at drawing, but drawing his entire body, hips swiveling, was a little advanced for my first at-home project and the first time I was using my new tools. So I simplified my idea and started sketching.

elvis sketches for screen printing

Once I had some elements I liked, I drew them on a larger scale on freezer paper, which is what I made my stencil from. I cut out the shapes, and then attached my stencil to my screen.

screen printing red ink

And then started! The first attempt was the worst.

first attempt at elvis screen printing

But that’s probably normal, right? The next few came out great! I like the imperfections and I love the color. These will go great on my wall.

elvis prints in red

family art project

I went home for the holidays, along with my siblings, their significant others, and their kids. My dad told us this week that we had a few projects to do before we could leave town. It would be like summer camp, he said. But for Christmas.

Christmas Camp started with family breakfasts where we learned to make southern biscuits and a book club meeting (more on that later). But one of the coolest things we did all week was a water color blob inspired art project.

art project wall

We started with a wall filled with paintings of blobs of color. My dad made them for us, he said, so that we could use ink to draw on the painting whatever image we saw in the blobs–kind of like spotting images in clouds. He had some examples.

art project sample

We each had to complete one drawing and put it back on the wall before the week ended. Well, we got a little carried away. One was just not enough. Soon we ran out of blobs and starting making more.

making more blobs

We used water colors, added some salt for texture, or used a straw to blow the paint for streaks of color–anything was fair game to get colors twisted and turned in juuuust the right way.

We had so much fun. It was so interesting to see what our family came up with, and everyone from grandkids to grandparents all participated. Here are some of my favorites. Don’t forget to sign your masterpiece!

art project water color 1


art project water color 3


art project water color 4


art project water color 5


art project water color 6


art project water color 7


art project water color 9

Here’s our wall when we were finished!

art project wall

crafty

things I’d like to be:

  • a morning person
  • a runner
  • a good bug squisher
  • buffy-level badass
  • an excellent detective
  • someone who winters on a tropical island

things I am:

  • definitely not a morning person
  • a yoga do-er when i feel like it
  • super grossed out and scared of bugs
  • not really a night owl either
  • kind of crafty

And I guess the things I am are ok, too. And it’s the being kind of crafty that led to this project that was really fun! Remember this picture frame/jewelry holder I saw before? That was my inspiration. I just made it more me.

I started with a giant hot pink picture frame I’ve been carrying from apartment to apartment because I knew it would be good for something even though it’s pretty heavy and difficult to hang because I rent.

And then I got out the paint that I used on my wall in my old place. Yes, I carried that with me to my new apartment, too. It’s a really good color (it’s Disney’s paint called Star Command Blue in an eggshell)

My favorite part of this whole process was stirring the paint. Look how cool the purple and blue swirls are! And then it magically turned the blue I knew so well.

And I started painting. Now, I’m not the best painter, I’ll admit it. Luckily this paint is pretty thick and it only took two coats. Also, I didn’t sand or prep this frame in any way, and that most likely would have made it work a lot better. But I had limited time and no prep materials, so I made do.

I did one coat. And then another. Some tiny pink still shows few in a few places after I was done, but that gives it character, right? This was after the first coat.

And then I found my ribbons and my hot glue gun and got to gluing. And then I ran out of each color of ribbon, which is why my design is so…unique. But that gives it even more character, right? Then all that’s left to do is add my jewelry to my new jewelry display holder.

One ribbon did come down last night, so I’ll reglue it and add some reinforcements maybe in the form of a nail or tack. But I just love the final product! I’ve been putting off decorating my room because company usually doesn’t see it, but this is a really great start that makes me excited to do more.