easy project friday: spray-painted mirror

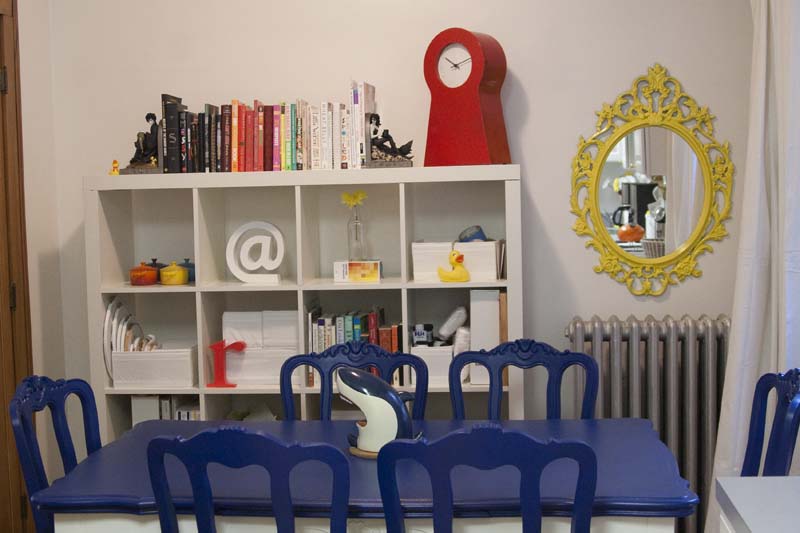
I have this mirror that I really like. It’s from Ikea–you’ve probably seen it before. I love that the frame is sort of ornate, but it’s small and different enough that it seems modern and fun. I like the black and I had it on my wall in black in my old apartment.

mirror

In this new place, I had just the right place to hang it, but the black wasn’t what I wanted. I have bold primary colors in this kitchen, so I tried to keep things light.

I covered the mirror with newspapers and used the same yellow spray paint I used when I spray painted a shelf last year–which I am now using in my bathroom. (It’s still yellow.)

spray painted mirror

And it’s like I have a whole new mirror.

dining area with spray painted mirror

I can’t afford to replace everything every time I change my mind or my apartment, even though I’m tempted to. But with some work and creativity, I really think you can make your home reflect your changing style. Even if it’s just details, like the color of a mirror.

Supplies:

easy project friday: painted canisters

painted canister tops for the kitchen

This easy project takes a little bit of paint in whatever colors you like, a paintbrush, and some painters tape.

I found these canisters at Goodwill and snagged them for just a few bucks. After a solid scrubbing I was ready to use them in my kitchen. I love the look of white and wood, but I wanted to add some pops of color to my counter.

containers for the kitchen counter

I started by taping off half of the top with painters tape. I used a ruler to help me find the middle, but you could also eyeball it or do a third, or fourth, or a diagonal. This is an easy project–have fun with it!

painted cannister tops

Then I painted half the top with each color. I’d recommend an acrylic paint–it is easy to use and has good coverage for projects like this. I did two coats of paint, but do whatever looks and feels right to you. Only paint the very top of the tops if you’re storing food in them–you don’t want paint fumes enclosed with your food.

Then all you have to do is wait for the paint to dry and slowly peel off that painters tape.

painted canisters for the kitchen

And you’re done! That’s all it takes to get some personal fun and color in your kitchen (or bathroom or bedroom or wherever you want!). Some materials:

(No one paid me to write about this project, but the Amazon links are affiliate. Updated at 10:16 a.m. to add sources to buy canisters)

easy project friday: using decorative paper

Sometimes all it takes to brighten up your life is a small change. This easy project takes just a few minutes and is very inexpensive–you just need some pretty paper or fabric, a ruler, scissors, and tape.

I love a glass cabinet but I’m not the most organized person. And if you’re going to be showing off your things with a window, they should look good sitting there. I have this little cabinet on the wall of my bathroom, and–let’s be real–none of the things I need in the bathroom are super cute to look at.

glass cabinet, decorative paper project

To hide my things and add some color and pattern to the bathroom, I found some decorative paper at Paper Source, a super cute paper store in my new neighborhood.

paper source paper

All you have to do is measure your window.

measure your window, decorative paper project

Cut out your paper (I added an inch to both sides so that I had some wiggle room when I was taping it up).

decorative paper project

And attach it to the back of your cabinet. You can use even just scotch tape, or you could try poster putty or tacks. Anything you feel is best to stick it to your cabinet without causing damage to it.

back of the cabinet, decorative paper project

Voila! After just a few minutes, it’s like you have a whole new cabinet.

decorative paper project

Change doesn’t have to be expensive or scary! And this is a great option for renters to add some color and pattern to their space without painting or adding wallpaper. Happy Friday! Now that this project is done, let’s relax.